Introduction
If you’re setting up your project for the first time, we recommend using the CLI by following the Quickstart guide.init Command
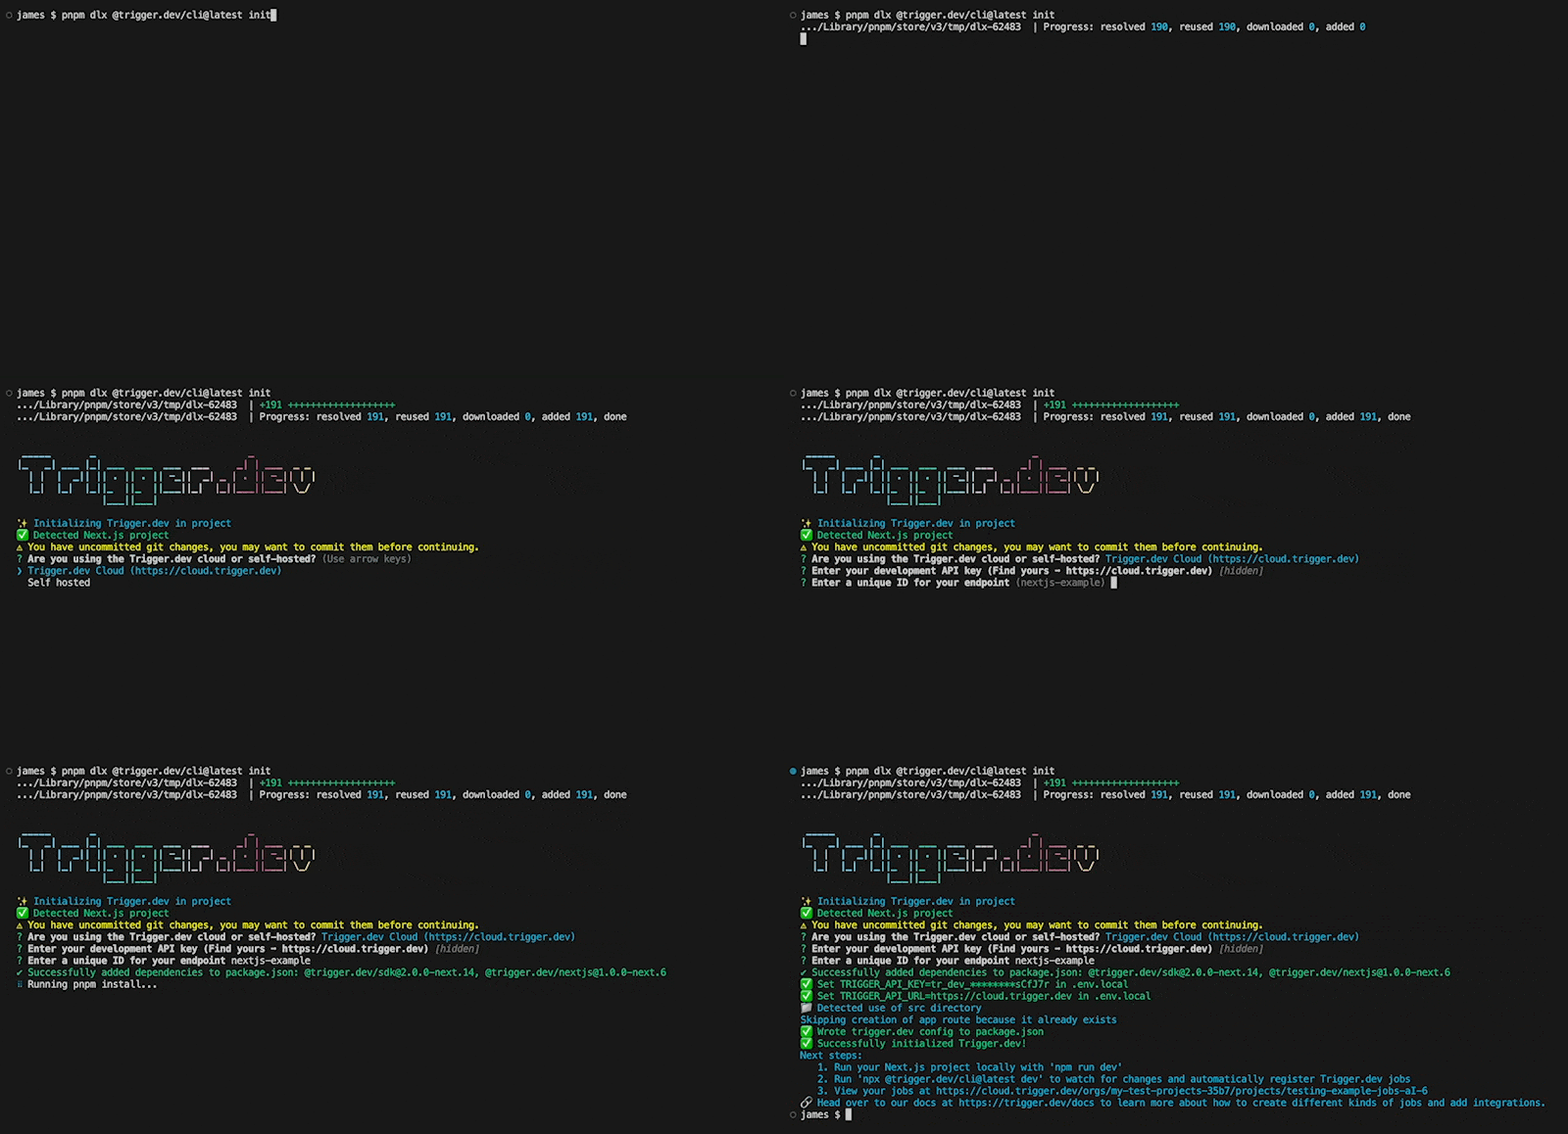
Theinit command incorporates Trigger.dev into your project. It performs the following functions:
- Adds Trigger.dev to the project.
- Creates a new route.
- Generates an example file. During execution, this command requires some configuration parameters. Detailed information on these parameters can be found in the next section.
 Run this
 init command in a terminal window to setup your project with Trigger.dev
CLI steps explained
Are you using the Trigger.dev cloud or self-hosted?
Are you using the Trigger.dev cloud or self-hosted?
Option 1: Trigger.dev Cloud
Trigger.dev Cloud is a fully hosted service that provides the easiest and quickest way to use Trigger.dev.
Option 2: Self-hosted
Instead of using the Trigger.dev Cloud service which we host for you, you
can host the Trigger.dev platform yourself. We provide an official
Trigger.dev Docker image you can use to easily self-host on your preferred
platform. More information on self-hosting can be found in the
self-hosting section of the docs
here.
Enter the URL of your self-hosted Trigger.dev instance
Enter the URL of your self-hosted Trigger.dev instance
When following the self-hosting guide you will deploy your Docker image to a platform of your choice. After completing this step, enter the URL of your self-hosted instance in this CLI step.
Enter your development API key
Enter your development API key
To locate your development API key, login to the Trigger.dev
dashboard and select the Project you want to connect to. Then click on
the Environments & API Keys tab in the left menu. You can copy your development API Key from the
field at the top of this page. (Your development key will start with
tr_dev_).Enter a unique ID for your endpoint
Enter a unique ID for your endpoint
Enter a custom ID or use the default by hitting enter. You can learn more about endpoints
here.
dev Command
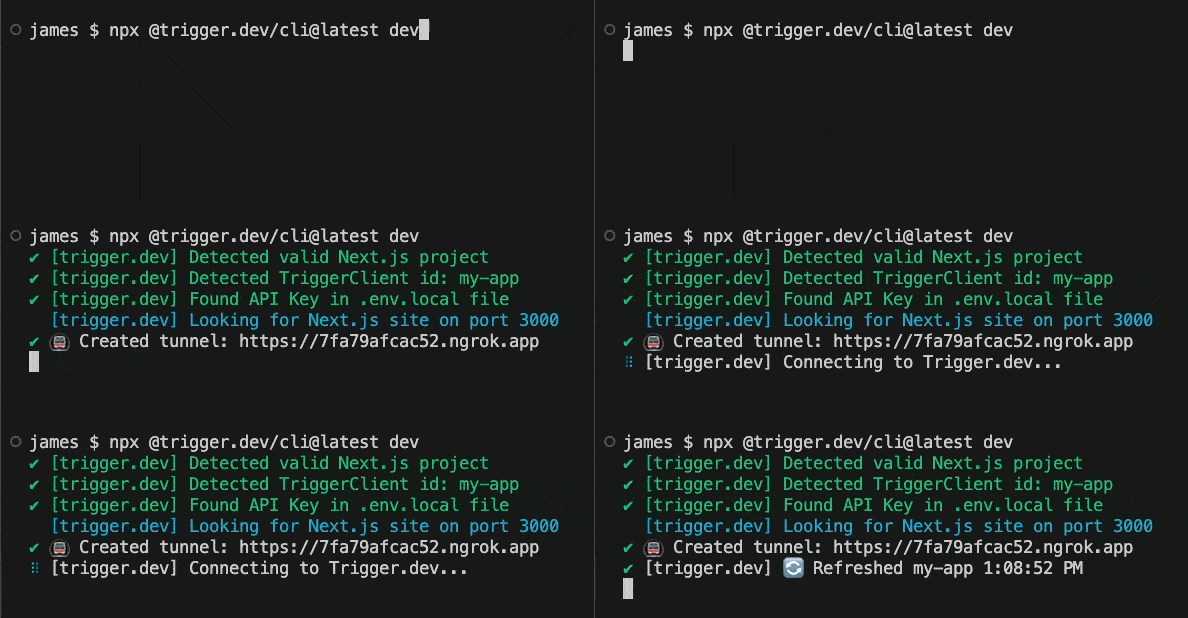
Once you’re running your project locally, you can then execute thedev CLI command to run Trigger.dev locally. You should run this command every time you want to use Trigger.dev locally.
 In a new terminal window or tab run:
You can optionally pass the port if you’re not running on 3000 by adding
--port 3001 to the endYou can optionally pass the hostname if you’re not running on localhost by adding
--hostname <host>. For example, in case your app is running on 0.0.0.0: --hostname 0.0.0.0.update Command
Theupdate command will update all Trigger.dev packages to the latest version.
whoami Command
Thewhoami command will print out information about your current Trigger.dev project and environment, based on the API key found in your .env or .env.local file
send-event Command
Thesend-event command will send an event to your Trigger.dev project. This is useful for testing your Trigger.dev project locally.

